Wednesday, December 12, 2012

Winter Quarter Week 2: Lighting and Cinematics


Rabil Thesis WIP 1 from Madeleine Rabil on Vimeo.

Time Tracking:
0h 30 min: Planning

1h 00 min: UDK Tutorials
2h 09 min: Cinematic Set Up
1h 00 min: Lighting Tutorial
1h 00 min: Planning
2h 00 min: Lighting/Importing in UDK
0h 48 min: Rendering
2h 12 min: Optimizing Light Maps
1h 00 min: Meeting with Thesis Assists
0h 49 min: Adjusting Lights

1h 11 min: Rendering Lights in UDK
1h 00 min: Adjustments in UDK
1h 00 min: Organization
1h 00 min: Fixing Issues
1h 30 min: Fixing z-fighting/exporting and reimporting meshes
0h 30 min: setting up cinematic in AE


Wednesday, December 5, 2012

Winter Week 1: Normal Baking Chaos

Fall break is over and after a week of relaxing I came back ready to rock this project. Because I managed to get all of my normal mapping done prior to the break, I was actually a week ahead of my previous schedule. As great as a taking another week off sounds, however, I learned a long time ago never to waste an opportunity to get ahead and stay ahead so I decided to spend the week on several things that I had been putting off instead. Due to various time constraints and tasks that were simply more important, I had put off looking into normal baking. While there where a few things I knew I would have to bake normals for, I wanted to see if baking down high poly smoothed meshes to my low poly geometry was something that would help my project aesthetically or not.
During my research I found that this was not something that everyone included in their workflow, so it wasn't entirely clear to me as to whether it was something I would absolutely need to do or not.
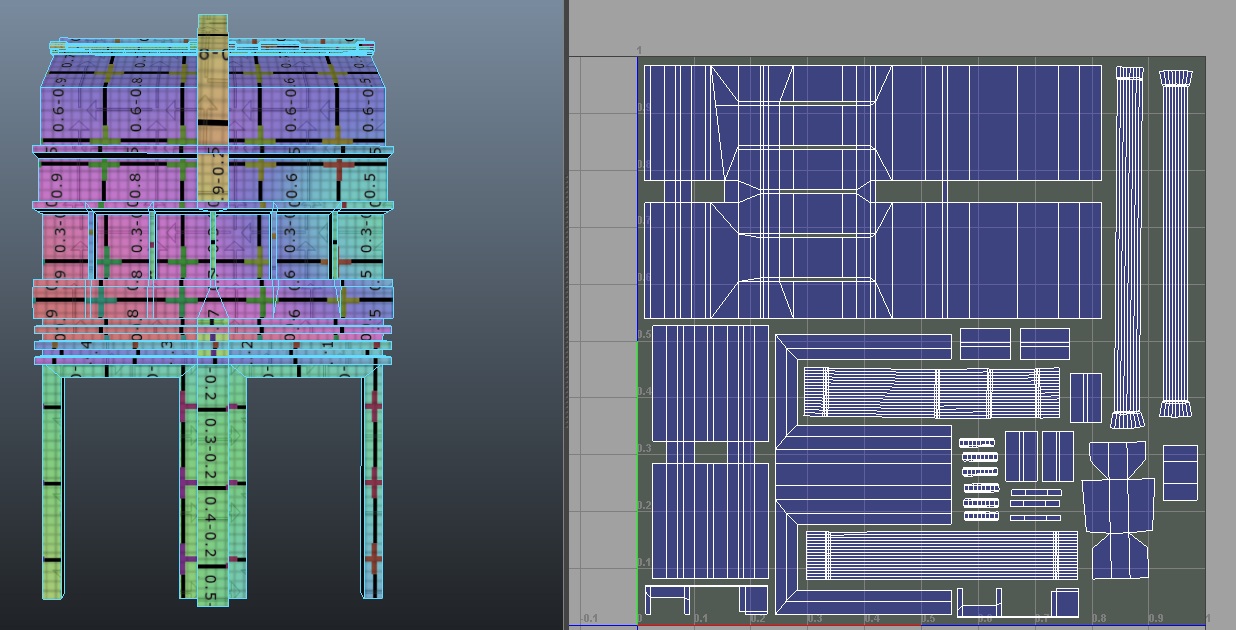
My first problem was that it was a process I knew about, but not one I had ever actually done so it meant I would being doing it for the first time. I watched several videos about transfer maps in maya, but because it is one of those processes that doesn't have a perfect answer (meaning the settings will change almost every time), I took me a long time to get it to work right. At first the transfer maps wouldn't even work. Then they would only pick up half the details. It got to the point where I had wasted about half the week trying to get it to work, and I was about ready to just give up, when I suddenly realized my problem. I was following all these tutorials online, but in all of them the user had their grid at the default Maya size. It occurred to me that because my scene is set up to UDK proportions, and therefore 16x larger than the default, and because I was transferring in world space, that i would need to adjust my max search distance to fit the size of the scene. I still didn't entirely understand the transfer map process, but after asking multiple people for help and still not having any solutions, I decided one last try wouldn't hurt. So I set my max search depth to 16% and crossed my fingers while I waited for the normals to bake. I opened the file, and finally found that it was successful.
Now for my second challenge, deciding if baking down the normals would be possible considering how much time I had left to get my project done. I had to consider how much time it took to set up each piece, bake down the normals, clean up any minor issues, and set them all up in my scene. I spent several hours setting up and baking out different pieces of my scene to get an idea how long it would take. Overall I was spending 1-3 hours on each object depending on it's complexity. With 162 objects in total, it was taking far too long. Had it gone like UVs where I was completing about 5 objects per hour it would've been more do-able, but my unfamiliarity with the process was making me slow, too slow.
Although it already seemed like I was not going to be attempting to bake out each object, I wanted to bring one of the objects into UDK and compare it's appearance to objects without their normals baked. I decided, that if it really made a difference aesthetically, than taking the time to do it could still be worthwhile.
The biggest thing baking high poly to low poly was going to do for me was effect the appearance of transitions between edges/surfaces. The objects that I had baked the high poly to the low poly had much softer and sometimes hardly even noticeable edge transitions. While this was not a back thing for smaller objects, I found that it didn't work well with most of the large objects in my scene and I actually preferred the much harder and sharper look of the non-baked objects. In the end I decided, that baking down the normals via transfer maps in maya was not going to be a worthwhile use of my time.
There were however, several smaller objects in my scene where I would need to bake down geometry. Several of the windows in my scene had details that I felt that could be baked down and done mostly through textures.


There were also several small objects that I just never got around to making last quarter that I wanted to make sure got done before I began texturing. The buildings are supposed to be worn down and even boarded up in some cases, so I wanted to several variations of scrap metal/scrap wood coverings to be placed on some of the windows.


Time Tracking:
1h 00m : Timeline and Planning
0h 33m : Background Building thumbs
2h 27m : Normal Baking
1h 55m : Normal Baking Workflow
3h 00m : Normal Baking
2h 00m : Modeling
0h 30m : Planning Organization
1h 36m : Modeling
2h 02m : Modeling/Normal Baking
2h 44m : Modeling
2h 15m : Modeling

21h 02m Total

Wednesday, November 7, 2012

Fall Week 9: UVs and Exporting

I don't have too many exciting things to show for this week. Most of the work I did involved UVs, which isn't the most exciting thing to look at.  I have also been exporting objects at the same time and slowly building things in UDK. Luckily, I'm very familiar with the UV process and things are actually going better than I was expecting. I have run into an issue with Lighting in UDK however, that I am currently investigating how to fix.

Basically it doesn't want to recognized my UVs for the Lightmaps, so when I bake the lights it looks pretty awful. I've never run into any problems with this before, so I'm not really sure what I am doing differently that is causing them to happen, but hopefully I'll figure it all out soon. There are several ways to fix it, and I'm already going over the options and trying to decided which course of action is the one I want to take. 

Anyways, here're a few of my UV maps that I did this week.


I have UVed 102 objects so far, and have roughly somewhere between 20-50 left. 

And here's a picture of what some of it looks like currently in UDK:

The lights haven't been baked, this is the preview version and so it doesn't look terrible here. 

Other than that, not much else is new. Just a lot of UVing and Exporting, and other than the issue with the light baking, things are going well.

Time Tracking:
4h 15m UV and Exporting
2h 36m UDK Importing and Layout
3h 06m UV and Exporting
7h 00m UV and Exporting
2h 00m UDK Importing and Layout
3h 00m UV and Exporting
1h 15m UDK Importing and Layout
0h 25m Blog Post

23h 37m Total

Tuesday, October 30, 2012

Fall Week 8- Last Week of Modeling

I got a lot done this week in terms of finishing up all the main models for the scene. Added in all the doors and different trims, and got the ground pieces separated out. Trying to decide how I wanted to do the ground took me more time than I would've liked and kind of felt like I was going around in circles for a lot of it. I'm still a little on the fence about it, but I'm hoping that putting it in UDK this week will help me figure out how to do it.
Once I got everything I absolutely needed modeled, I had a little bit of time left over to add in some small assets. I'm really hoping that I can get a Thesis assist next quarter to make some more for me while I work on the textures because the scene just feels really bare right now. Part of that is due to the fact that there aren't any textures, but I'd really like to get a lot of smaller simpler assets done for the scene to help it feel more finished.


I just did some quick AO passes.  I know some of the details I have now will need to be baked down to normals which hopefully wont be too difficult since I still have copies of models when they were lower res. But that is something that will have to wait until next quarter since I will be focusing on setting up the scene in UDK, UVs, and my presentation for finals week for the rest of fall. Hopefully the import and set up in UDK will go smoothly as I took a little long than I initially wanted on the modeling. I'm also hoping to have everything for my final done early so I can knock out as many UVs as possible before the end of the quarter.

Luckily I am very familiar with the UV process (both new and old methods) so I'm not worried about that, it's just getting them all done as efficiently and as quickly as possible. The nice thing about having modular pieces is that I only have to UV each part once and then get to duplicate it as many times as I need instead of having to do the whole building in one set.

Time Tracking:
2h 00m Modeling
4h 00m Modeling
5h 00m Modeling
7h 00m Modeling
2h 30m Modeling
0h 45m Rendering
0h 25m Blog Post

21h 40m Total

Tuesday, October 23, 2012

Fall Week 7- Intensive Modeling

Once again I spent the week modeling. I added in a lot more of the details in terms of what I need for the profiles of the various pieces, and overall the scene feels a lot more complete.
I went ahead and took a little bit of time to throw in a quick sun and sky for some nicer renders for this week instead of just using screen shots like I have been. The shadows could be improved, but since my goal is put this in UDK, spending time setting up nice renders in maya, especially this early on, isn't really a good use of my time.
I added trim as well as the details for the side doors and window vents. I'd say I'm about 80-90% done with the base for the train station. There's a lot more pipes I want to work on adding in, but I'm going to be making a small modular set for that. I still need to model the doors.
I added some more architectural detail to the Lux and made some changes to the windows. I'm not sure if all the detail is necessary, but because I still have the old versions of the model it will be easy to scale back a bit if I need to. Aside from the signs and extra decorations I'd like to add, and finishing the doors and store front windows the models for the Lux are pretty much done.
I didn't have too much to change for McQuinn, and other than the doors and any extra decorations it is also done. I played around with making some scrap metal and stuff as covering for closed shops, but I want to wait a little bit before I really delve into making that kind of stuff. Mostly because I need to make sure I plan it carefully enough that I can use it in various places through out the scene. One of the major points of modularity is to reduce the number of unique assets so I want to make sure the boards and other scraps I make can be used effectively.


Of all the buildings, Tepton went through the most changes. I didn't like the feeling I was getting from the design of the side doorways so I changed facade quite a bit. I also modeled the details in the actual gates. If you look below you'll see (aside from the bad shadows I mentioned earlier) that I added in the train tracks as well as a special transitional piece for when the train passes through the actual gate house.

I'm really hoping to push through the last phases of the silhouette pass modeling this week so that I can start putting the level together in UDK and then switch gears to UVing in prepartion for next quarter.

Time Tracking:
0h 30m Gnoman Disk
1h 30m Organization
2h 00m Modeling
6h 00m Modeling
2h 00m Modeling
5h 00m Modeling
2h 00m Modeling
1h 00m Rendering and Set-up
0h 30m Blog

20h 30m Total

Tuesday, October 16, 2012

Fall Week 6: Modeling

Not much to talk about this week, spent the whole time modeling and making adjustments. Got a start on Tepton Gate and continued working on the rest of the buildings.


Time Tracking:
4h 30m Silhouette pass
8h 00m Silhouette pass

20h 30m Total

Tuesday, October 9, 2012

Fall Week 5: Proposals, Doubt, and Resilence


Proposals
This week I presented my project proposal. Of course, now that I had officially pitched my project and was actually building it, I was noticing things that I needed to change all over the place. The day before pitched my project I was going over my design document one last time, when I realized I was trying to do too much. I had already eliminated my initial list of "wants" from my project, but I hadn't gotten rid of any of my needs. I wasn't leaving any room for cutting- and while I wanted to tell myself I could do everything, I knew that not allowing for scaling down if I need to was going to be a huge mistake. 

Doubt
Anyone who has ever worked on a huge project that they have invested a large amount of time into knows that there are always moments of panic, doubt, and fear. This was one of those moments.

Suddenly I felt overwhelmed, it was the day before my proposal was due and I didn't know if I would be allowed to make changes. How would I even make changes? I had done so much planning and things felt as though they were already permanently set in stone. I had already scaled down my idea three times, and I here I was realizing it was still too big. 

I spent the next day in a slump. Proposing my project to my class felt like watching myself dig my own grave. This was my thesis, everything I had been working towards at school was all leading me to this moment, and there I was setting myself up for what was surely going to be failure. 

Resilience

I walked home from the computer lab the night after I proposed my thesis, and spent the entire walk trying to  find a reason to have hope. I kept telling myself, "I can do this," but being more of a realist I knew there was no way I could realistically get everything I had proposed to do done, while keeping both my jobs, passing my other classes, and have it not look like trash.

But I felt stuck, and no matter how many times I went over the situation in my head I couldn't figure a way out. We get in trouble if we don't finish our thesis and in the past I have seen dedicated and hard working students be told that they can't cut(these were small things that did not jeopardize the overall project-as I have seen other students try and change their thesis entire in the middle of it which should not be allowed for obvious reasons) from their thesis at all and that they just have to work harder. In my mind not being able to make cuts is bad project management- but as students who are graded for our projects we also have to adhere to the decisions of our professors.

In the end I decided to do what I have always done in these situations, I decided to go down fighting no matter what. Maybe it was hopeless, but if that's my only option then it is the one I am going to take. so I picked myself up and jumped into modeling. 

Whitebox

I don't know if it's possible to be a realist and an optimist, but even though I felt the opposite I told myself I was going to figure this out.
My fake optimism paid off, because while I was blocking out my white box I suddenly conceptualized a solution. I say conceptualized because it was the same as the first time I pictured the scene except I had a knew idea. 


I realized that if I made the train tracks part of a tunnel way below further below the shops, I could not only eliminate some of the more worrisome parts of my thesis, but that I could easily cut them out all together if push came to shove and things needed to be done. Rather than being a train station it would simply become a subway/metro which was something I was initially considering at the start of my project anyway. The train tracks would not be visible because they are underground. I will easily be able to make a floor model for a central courtyard should the track need to be removed.

 I got to keep the basic layout of my scene which I was already dedicated to as well as trim off several assets that were required simply because I was going to have the station on a higher level. In terms of project management it was a perfect solution because it did not damage the overall outcome I was trying to achieve and did not require any massive changes to my plans. 

UDK

Once I had that finished, I was ready to bring it into UDK to test out the proportions. I was a little nervous about opening up UDK for the first time in almost 2 years, and spent a little bit of time just playing around with the interface before I even attempted to bring my model in. I was surprised to find that even though I was missing a lot of the more specific details about using the editor, I was still familiar enough to pick them back up rather quickly. Although, I will admit I was able to ask one of my friends for help whenever I got stuck on something so that made things a lot easier.

Things do not go entirely smooth either, as I immediately ran into an issue with my white box model when I brought it into UDK. When testing out the door size I had chosen to see if it worked, I discovered that the character in UDK was two grid sizes taller than what I gotten from my research. 

I was at a complete loss. I had looked at multiple resources on the web when determining that the character was 6uu(UDK Units) tall during my research. All of them had given me the exact same data for character height and grid set up, but there I was in UDK with a character that was very clearly 8uu tall.

At first I didn't believe it and double checked my maya files to make sure I had the right dimensions there, which I did. I double checked to make sure my geometry was translating to being the same grid size in UDK, which it was.  I made sure that I had UDK set to its default settings, and still nothing had changed.  I even went back to the resources I had gotten my information from and none of them said anything about why this might be happening or even mentioned that it possible would. All the numbers they said to use were the exact same as what I had used.

It looked as though I would have to adjust all of my scene's measurements, which I was prepared for since that was the whole point of checking in the first place but I had hoped that my research had been solid enough to prevent the need. But before I could do that I had to figure out just how tall the character was.

With the help of my friend, Ben, we made a mock character out of barrel assets and attached it to character in the game(the character it self would not show up even though Ben was  sure he had the right settings for it) and set up a camera to record it during game play so we could figure out exactly how tall the character was. From this we were able to determine that the character was set to exactly 8uu tall.

I was slightly distraught over the situation and the fact that I had apparently messed something up, and decided that there had to be something else I could do. So I did the only thing some one in my situation could, I turned to the internet. And as luck would have it I very quickly found my answer.

It turns out that the character is not set to the UDK default character setting of 6uu by default. Something which none of the websites I had gone to for research had bothered to mention. Luckily I found a blog that not only explained it, but told me how to fix it.

 All I had to do was go into the world properties and set the game type to UT game. Which was of course the obvious thing to do once I read it. 

I am so glad I decided to look into it further, because it saved me hours of work in terms of refiguring out the scale of my level.


And now that my character and world was set to the scale I had planned for, I was relieved to find that many of the dimensions I had chosen worked. However, I also found that there were a number of things I had also gotten wrong. 

The walkways I had made were far too narrow and completely unrealistic for the city scene I was planning. The height of the bridge as well as the depth of the train tracks was not deep enough. I also found that because the train station was now on the same level as the Lux and the Mc Quinn Outlets that it did not stand out as much as I wanted it to. So I decided to make it's structure larger overall. 

The image on the right is the whitebox model after I adjusted the different proportions. I brough the new model into UDK and found that it was a vast improvement. 

Silhouette Pass

I had actually planned for the majority of my time this week to be spent of trying to figure things out in UDK, but I got the hang of it so quickly that I was done after several hours. I don't like to waste time, so I got a head start on my silhouette models for the scene. Things are going really well now that I


Things are going really well now that I've managed to get back on my feet and I'm looking forward to keeping up the work!

Time Tracking:
1hr 00m: Whitebox modeling
2hr 00m: Whitebox modeling
0hr 30m: UDK Refresher
1hr 30m: UDK-Whitebox testing
2hr 00m: Whitebox adjustments
0hr 20m: Whitebox adjustments
0hr 13m: Checking adjusted whitebox in UDK
4hr 05m: Silhouette Modeling
2hr 035m: Silhouette Modeling
4hr 32m: Silhouette Modeling
1hr 49m: Blog Post

21hr 14m Total